
With WP STAGING Pro you can quickly & easily set up a test environment for your website. In this article I will show you which features the Pro version has to offer and how you can create a staging environment on a subdomain.
About WP STAGING Pro
WP STAGING is the most popular WordPress staging plugin developed by the German back-end developer René Hermenau.
It allows you to quickly and easily create a clone of your website and then use it as a test environment (staging site). So you can safely test changes, plugin updates, WordPress updates etc. without touching your live site.
You can also prepare a redesign of your website without time pressure.
The free version of the plugin offers you all important basic functions to set up a well-functioning staging site. For most users, this is usually quite sufficient.
Those who want more functions and comfort will be thrilled by the pro version. Because this contains even more awesome features that are very useful and simplify the work immensely.
Most important Features
- Website cloning and creation of staging site in subdirectory
- Staging site on subdomain / other domain (Pro only)
- Separate database for clone (Pro only)
- Clone can be created in separate directory (Pro only)
- Push to live: changes can be pushed to live site with one click (Pro only)
- Migration to other server / domain (Pro only)
- Backup (Pro only)
- Support for MultiSites (Pro only)
- User role management for staging site
- Documentation
- Support
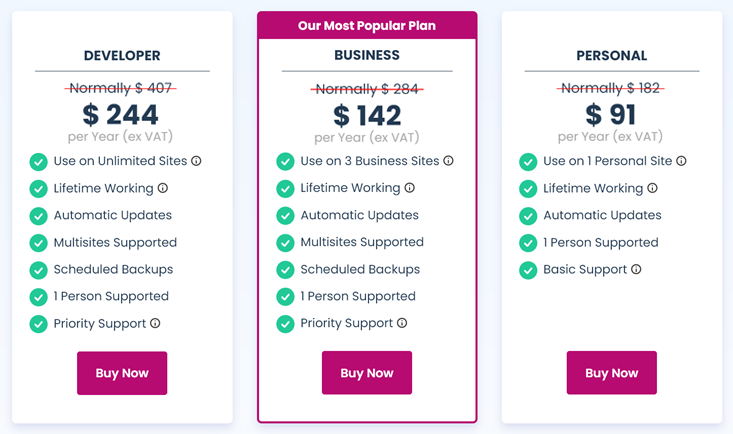
Pricing
Besides the free basic version, WP STAGING Pro is also available in 3 different pricing plans and starts at €89,- per year.
Guide WP STAGING Pro on subdomain
In contrast to the free version, WP STAGING Pro allows you to run your staging environment completely separate from the live site.
So it is not accessible under domain.com/staging, but under a subdomain or a completely different domain.
Also the physical data can be stored in a separate directory and connected to a separate database.
Plugin installation
The installation of WP STAGING Pro works like most WordPress premium plugins.
After your purchase, you will receive a zip file that you can install directly from the WP Dashboard. After that you only have to enter the license key.

Before you start creating a test environment, you should definitely make a backup.
Backup with WP STAGING Pro
Before making any changes to your website, you should of course create a backup. This feature is included in WP STAGING Pro since a short time.
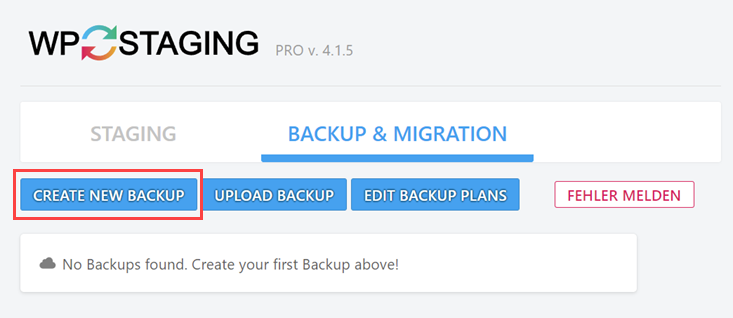
The Backup works very quickly and easily:
Click the button, select the desired files or database, start the backup. That’s it!
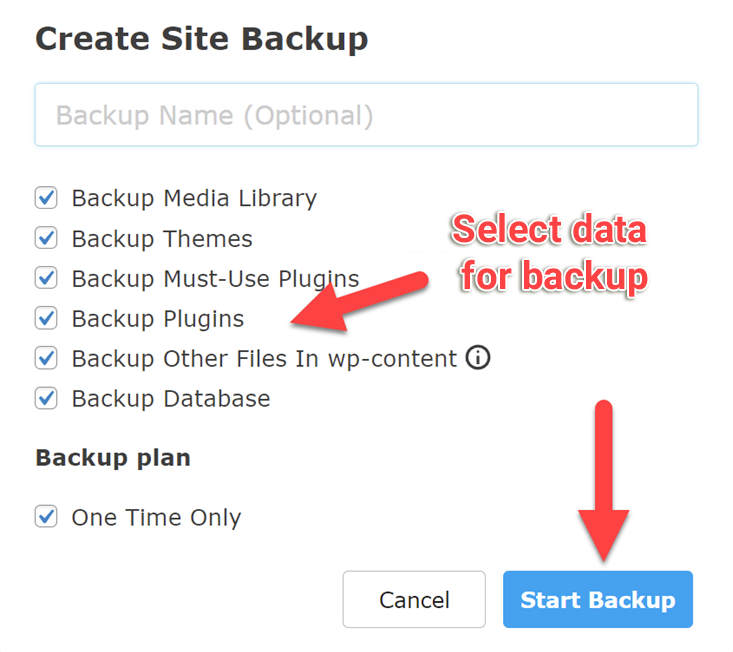
After that you can save the backup on your computer.
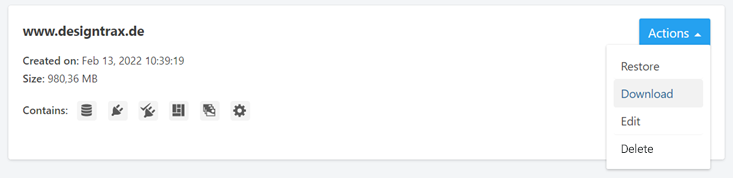
Automated backup schedules, such as a weekly backup, can also be set up if desired.
Create Staging Site on Subdomain
Before you start with your staging site, you should create a subdomain for your test site at your hoster. If you want to use a separate database for this purpose, it’s best to create one right away.
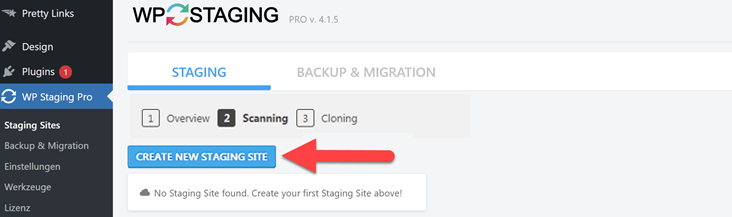
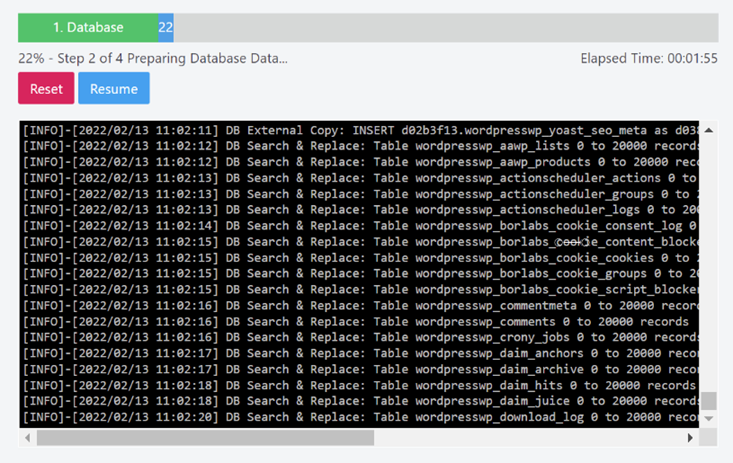
Now log in to your live site and click on “Staging Sites” in the WP STAGING Pro menu. With the button “Create new staging site” the tool starts cloning the site.
As in the free version, there are several options available:
- Database Tables
Here you can select which tables should be copied to the staging site. - Files
Also with the files you can specify exactly what will be transferred to the staging environment. - Advanced Settings
In this section you can find the special features of WP STAGING Pro. In contrast to the Free version, you can define here where exactly your staging-site will be set up.
If you want to set up your staging-site on a subdomain or completely different domain, you have to add some information in the Advanced Settings.
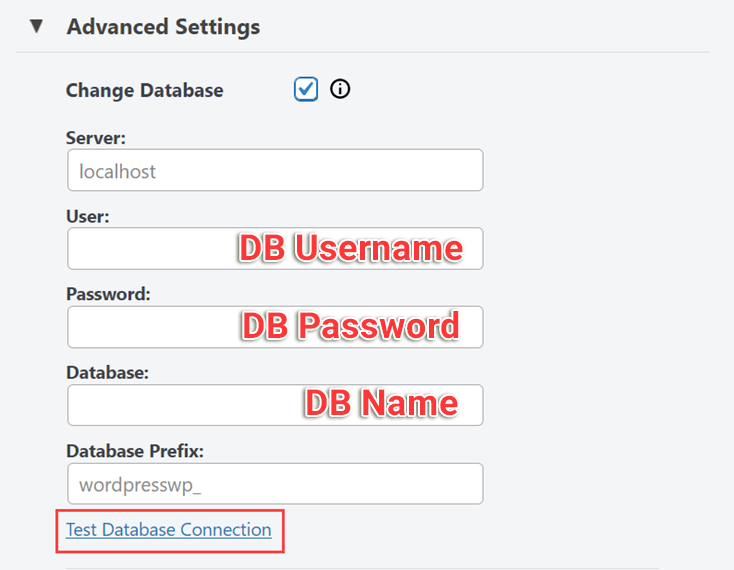
Advanced Settings

- Change Database
Here you enter the access data for your new database.
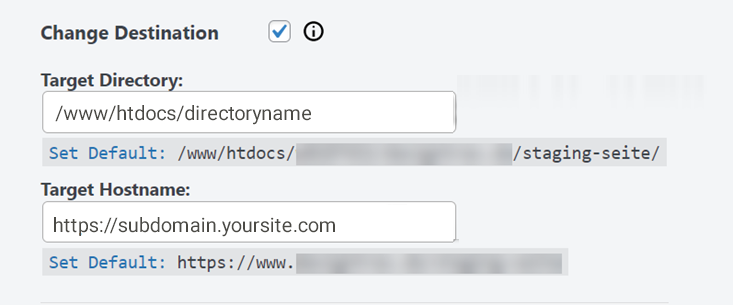
The best way to check if a connection to the database can be established is to click on “Test Database Connection“. - Change Destination
If you want the staging site to be installed in a different directory than your live site, enter the path to the server directory here.
Do you want the cloned page to run on a subdomain or other domain? Then enter the complete domain address here.
Then you start creating the staging environment by clicking the button.
WP STAGING Pro will now create the staging site on subdomain with separate database.
Once the cloned site is ready, you can access your test site by clicking the “Open Staging Site” button.

Here the admin bar is then colored orange – so you always know that you are currently on the staging environment.

Push to Live: Transfer changes to live site
Did you make some changes on your staging-site? And now you want to push them to the live page? That’s very easy with the Push to live feature. For me, this is the best feature of WP STAGING Pro! Because with just a few clicks, the plugin transfers your changes from the staging-site to the live website.
To do this, first select the relevant staging-site and click on “Push Changes“.

In the next step you define which tables and data should be transferred to the live site.
You should deselect tables with comments or store orders, for example. Because while you were tinkering on the staging-site, more current data might have been added to the production site in the meantime.
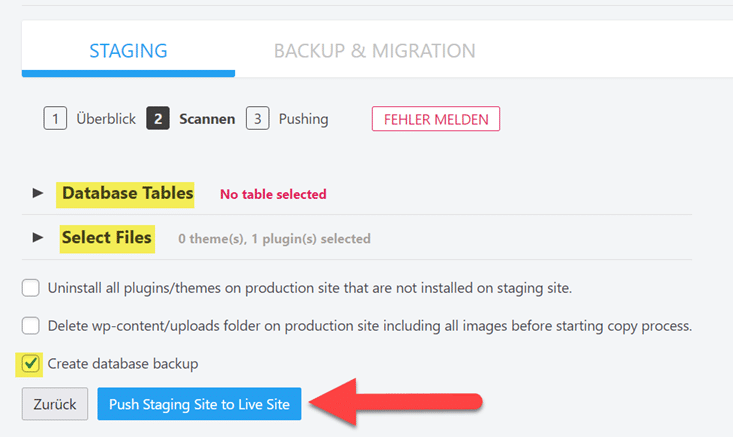
Once you have everything selected, you can copy the staging site to the production site.
Once the transfer of the change is completed, you will receive a success message.
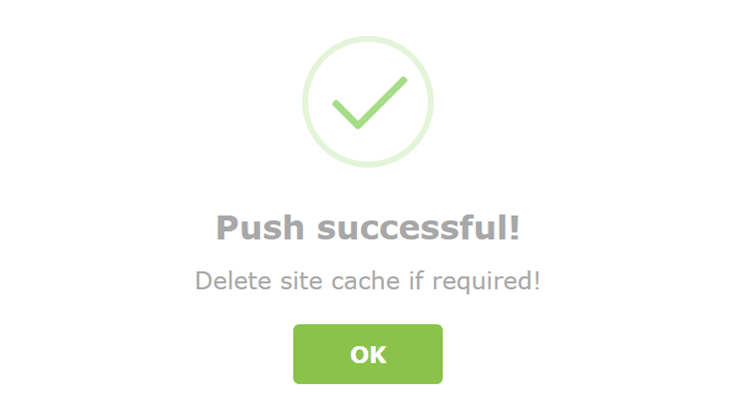
Now you can check your live site and see if the customizations from the staging site have been applied. If you are using a caching plugin, you may need to clear the cache.
Advice for Elementor users
In the past, there were frequent complaints because a staging site required an additional license for Elementor Pro. But Elementor has fortunately rectified this!
If you create your staging environment on a subdomain with the following names, you can use Elementor Pro without any problems:
- dev.yourdomain.com
- local.yourdomain.com
- test.yourdomain.com
- staging.yourdomain.com
FAQ
What is a staging site?
A staging site is an exact copy (clone) of your real website, installed in a subdirectory or subdomain. It is used as a “stage” or test environment where changes or updates can be made safely. The live site remains unaffected.
Is it worth buying WP Staging Pro?
The basic features for creating a staging site are covered with the free version of WP STAGING. If the following features are important to you, it is definitely worth buying the paid version:
- Cloning to another domain / subdomain
- Separate database
- Push to Live (transfer your changes from staging-site to production site)
Is there a WP STAGING alternative?
Some hosters like Raidboxes or Kinsta already offer a staging environment in their hosting plans. There are also WordPress staging plugins like Duplicator (requires manual setup), which can be used to create a test environment.
Is my staging site publicly visible?
No! The staging site is protected by an additional password request. And indexing by Google and other search engines is prevented.