
Have you ever crashed your website? Or accidentally deleted images? It happened to me just recently! After using a cleaner tool for optimization, the website was suddenly down. But thankfully, I had created a WordPress backup beforehand. So I was able to undo everything within 5 minutes.
In this post I’ll show you how easily you can set up a backup with UpdraftPlus.
Why you should create a WordPress backup
Having a website without a backup is almost like driving a car without a seatbelt. In most cases, nothing happens. But in an emergency, you’ll be glad you took safety precautions.
Most bloggers or website owners invest a lot of time in building and maintaining their site. In doing so, they usually forget to backup their work. What could possibly happen…?! But what if:
- Your website has been hacked?
- The installation of a plugin causes errors?
- An update of plugins, themes or WordPress itself crashes your site?
- You accidentally deleted important data like images?
- The code snippets you inserted are causing problems?
If you have made a WordPress backup, you can stay relatively relaxed. And simply restore your data.
UpdraftPlus WordPress Backup Plugin
UpdraftPlus is one of the most used tools for WordPress backups with over 3 million active installations. The user rating is also very good with 5 out of 5 stars.
I used BackWpUp for a long time and had frequent problems with it. Therefore, I tested several other plugins and finally ended up with UpdraftPlus. In the meantime I like to use it successfully for my own sites as well as for customer projects.
The setup is hassle-free and also the restore of data has so far always worked quickly and well. Therefore, I can really only recommend it.
Most important Features:
- Backup to Amazon s3, Dropbox, Google Drive, Rackspace, FTP, SFTP, E-Mail and more
- Automatic backups for which a schedule can be created
- Instant or manual WordPress backup
- Separate backup of database and files at different times
- Fast recovery (backups of both database and files)
- Failed uploads are automatically resumed or repeated
- Large websites can also be split into multiple archives
- Select which components of a backup should be restored
- Download backup archives directly from WordPress dashboard
- Debug mode – complete logging of the backup
- Also supported by older PHP versions (5.2 – 7.1)
UpdraftPlus Premium
For a normal, well-working WordPress backup, however, the free version is quite sufficient. If you need more features, UpdraftPlus Premium* is a good choice.
It offers of course all the features of the free version plus some useful features like:
- Incremental Backups
Only the changes since the last backup are saved. Because of the partial backup the amount of data is a bit smaller. - Automatic backups before updates
- Compatible with multisites
- Backup of WordPress core data and other directories
- Database Encryption
- Clone & Migrate
Allows you to clone your website and move it to another server / hoster, for example. - UpdraftVault
Updraft offers with UpdraftVault a special storage with 1GB data volume.
Here you can find a comparison of UpdraftPlus Free vs. UpdraftPlus Premium*.
Prices are starting at $70,- per year for the complete package. Individual components can also be purchased separately starting at $25,-.
Guide: WordPress Backup with UpdraftPlus
Installing UpdraftPlus
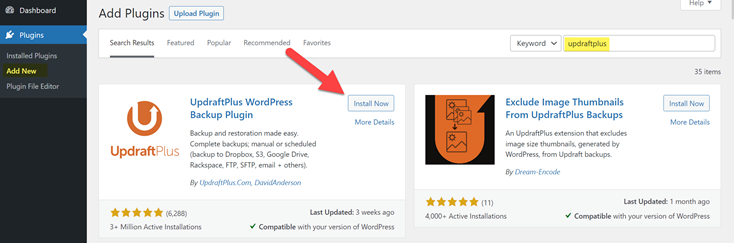
As always with WordPress, installing the WP plugin is very simple:
All you have to do is click on the Plugins > Install Plugins menu item in the Dashboard. There you can search for UpdraftPlus and install it with the click of a button. After that, you just need to activate it.
Setup UpdraftPlus
Before you can create your first WordPress backup, UpdraftPlus needs to be set up, of course.
The necessary settings can be found in the plugin settings.
Set backup schedule
In the first section you can set a schedule. In other words, you can specify the intervals at which you want to create automatic backups. You can also specify how many backups you want to keep.
You can also set different backup intervals for the database and the files.
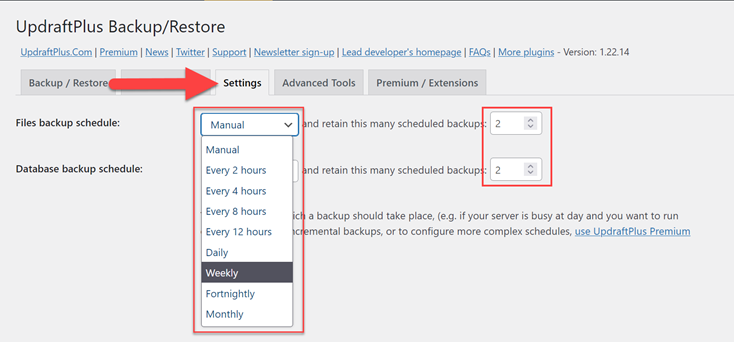
For most websites, a weekly or daily backup is sufficient. Blogs that post several articles a day should of course choose a shorter interval. I myself backup weekly and create a manual backup as needed.
The number of backups kept always depends on the available disk space as well. Especially with cheap hosters this can lead to problems. Because here you often have only a few GB available. Or if the Dropbox storage is no longer sufficient.
In addition, I also store the backups locally on my computer.
Choose Remote Storage
In the next section you have to select the remote storage This is the place where the backup will be saved. Here you have several options to choose from:
- Cloud storage, such as Dropbox, Google Drive and others.
- FTP Server, on your web server.
- E-mail, then you receive the data by e-mail. However, this is not recommended for large amounts of data.

Of course I can’t present all possibilities in detail. Therefore I show you step by step the settings for a backup to FTP and Dropbox.
WordPress Backup to FTP:
As soon as you click on the icon for FTP, more options will appear.
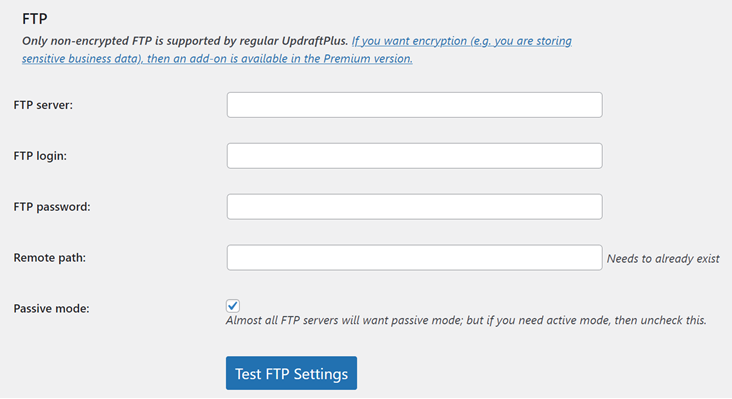
Now you have to enter the access data to your server:
- FTP-Server, e.g.: ftp.domain.com
- FTP username
- FTP password
Further information is usually not necessary. Finally you can test the FTP settings and hopefully you will get a success message.
Don’t forget to save the changes afterwards.
Tip: All backup data is stored in the Updraft folder by default. This should be writable. If you want to be absolutely sure, you should not store the backup archives on the server. It is better to store them locally and then delete them from the server.
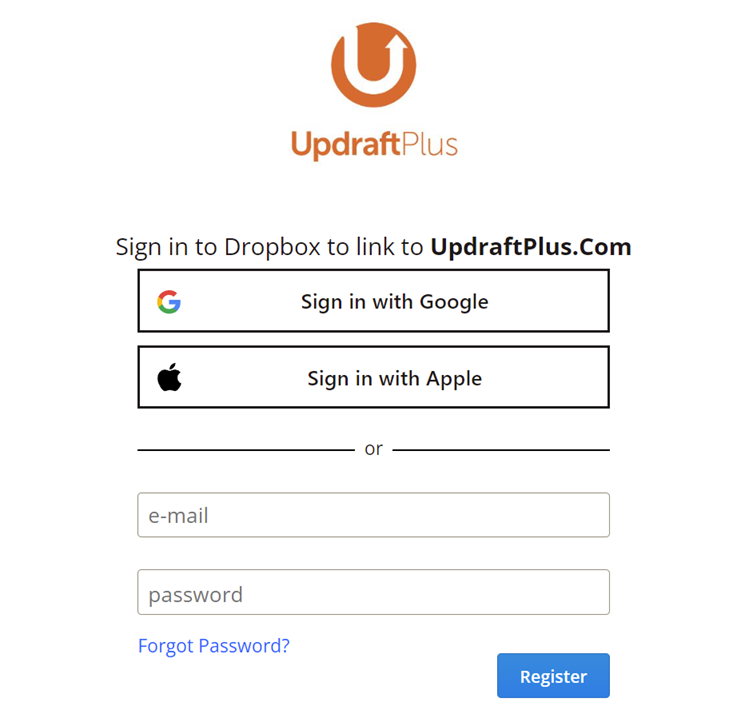
WordPress Backup to Dropbox
If you want to save your backup to your Dropbox, just click on the corresponding icon. Then you have to save the settings.
Only then can you set up the Dropbox connection. To do this, follow the instructions or click on the link that establishes a connection to Dropbox.
Include / Exclude Files
In the next section, the selection of the data to be saved takes place.
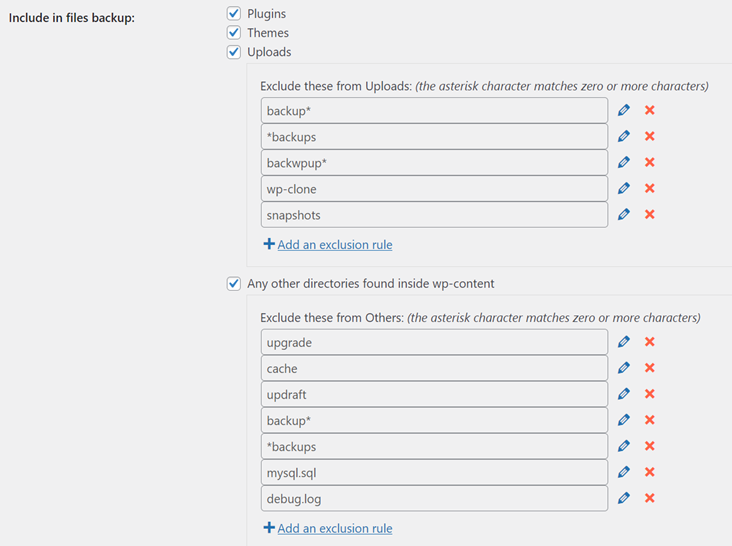
Here you determine which data exactly should be saved:
- Plugins
- Themes
- Uploads
- Other data contained in the wp-content directory
Additionally, you can exclude certain files and directories from the backup. For example, you can skip backup data of another plugin or cache directories. This keeps the size of the backup manageable.
More settings
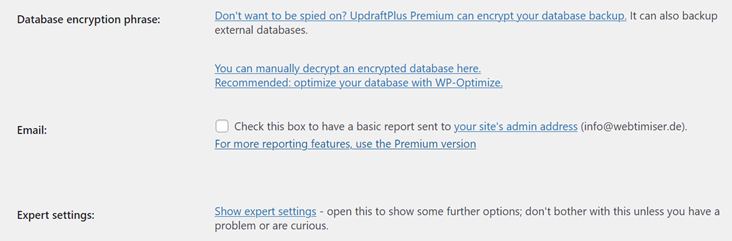
Database encryption phrase:
UpdraftPlus additionally offers encryption of the database backup. However, this is only possible in the paid premium version*.
In the last section you can activate an e-mail notification. This will send you a basic report when the backup is complete.
Expert settings:
The expert settings offer some interesting features. However, you do not usually need them for a standard backup.
For example, you can rename the backup directory or split the backup archive. This is especially useful for very large websites.
If errors occur during the creation of the backup, you can also activate a debug mode here.
Start WordPress backup
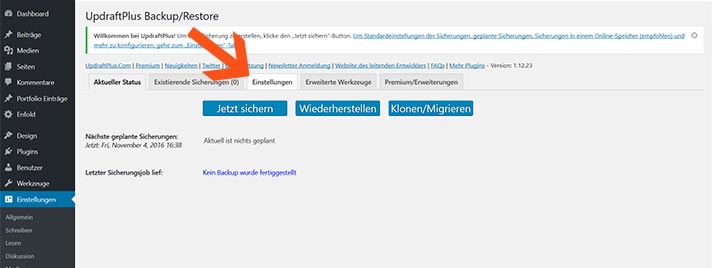
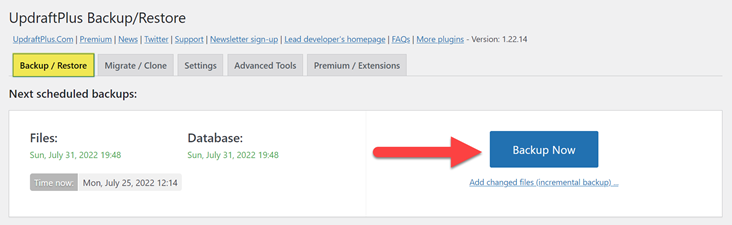
Now that all settings are saved, you can finally create your first manual WordPress backup.
To do this, you just have to click on “Backup now” in the Backup / Restore tab.
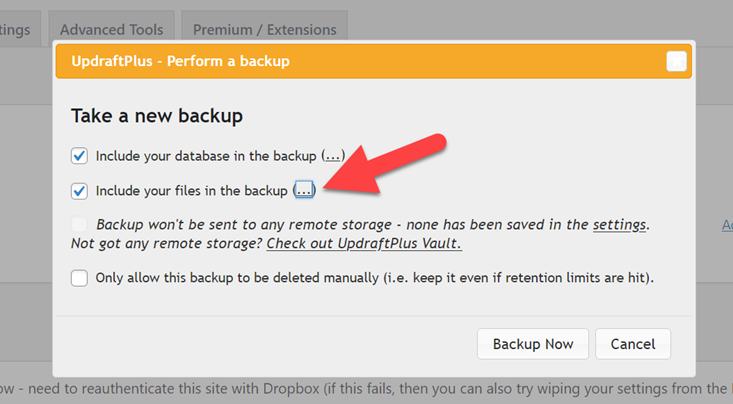
A pop-up will then open. Here you can change the default settings again and then start the backup.
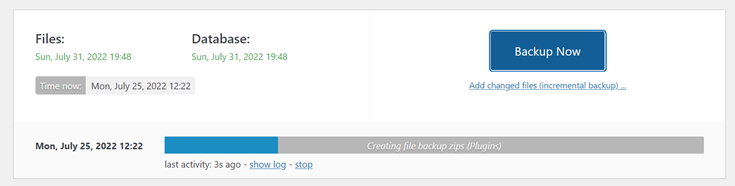
Backup completed
Once the backup is complete, you will receive a short success message.
But of course, no plugin provider can give a hundred percent guarantee that the backup will work.
Therefore, you should take a quick look at the log file. Here you can track down possible errors when creating the backup.
Depending on which storage nethod you have chosen, the backup is now located on your server or in Dropbox.
Restore WordPress backup
If you need to restore a backup, UpdraftPlus will do it in a few minutes.
In the Backup / Restore tab you will find an overview of all backups created so far.
First, select the backup with the correct backup date and click on the Restore button.

Then you select which data should be restored.
The selected data will be replaced with the backup. For example, if you check only the themes, all your themes will be overwritten with the backup. Plugins, uploads and the database remain unchanged.
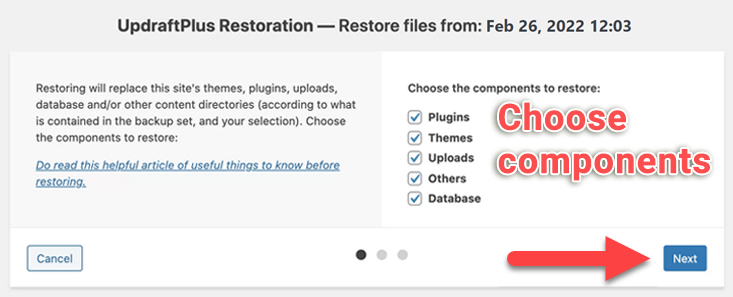
After you have made your selection, all you have to do is click Restore. UpdraftPlus will then start preparing for the restore.
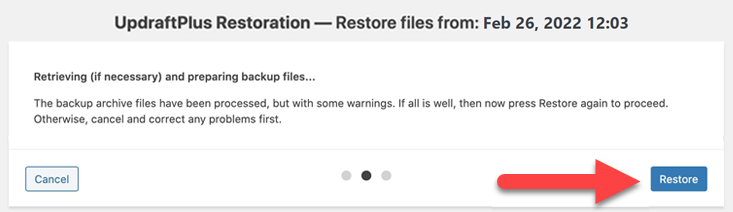
Finally, you need to click Restore again to complete the restore.
Restore successful
Once the backup is successfully restored, you will get a success message.

Conclusion
If you run a website, you should also make a backup of it at regular intervals. This way you can restore the site in a short time if the worst comes to the worst.
Which plugin you use for this is actually of secondary importance. Because most backup tools differ only in a few features and in the handling.
For example, you can also use the popular plugin WP Staging. Actually, the tool is intended for setting up a test environment (staging site), but now WP Staging Pro also offers a very good backup functionality.
If your website is hosted by a WordPress hoster like Kinsta, you can do without Backup Plugin. Because here the WordPress backups are created daily and automatically.
FAQ
How often should you perform a backup?
It always depends on how often the website is edited.
For blogs that publish new articles daily, the backup should also be done daily. For websites with infrequent changes, a weekly backup is sufficient. These backups can be done automatically by plugins.
In addition, in some cases, I also recommend you to do manual WordPress backups:
- Before a WordPress update
- Before a theme or plugin update
- Before cleaning up WordPress.
- If you plan to change code in functions.php or templates
What is saved during the WordPress backup?
Most plugins back up the following components:
- WordPress databse
- Plugins
- Themes
- wp-content: Uploads like images, videos